

Your Website is Ready for UAT Testing—What’s Next?
Congratulations! Your website has completed the development phase and is now ready for User Acceptance Testing (UAT). But what does that mean? How should you approach testing, and how will you know when it’s complete? If you’re unsure, this guide will help clarify the process.
What Should You Test?
There are three main types of testing:
- Regression Testing: Focuses on identifying issues such as broken features, errors, and inconsistencies. This is the primary focus for client testing.
- Non-Functional Testing: Evaluates performance aspects like speed and stability. Handled by Inorbital.
- Functional Testing: Checks code, validation, and accessibility. Also managed by Inorbital.
How to Conduct Regression Testing
Create a test plan using a spreadsheet to outline:
- Goal: What is the user trying to accomplish? (e.g., Online Form Submission)
- Success Criterion: Expected outcomes for each goal. (e.g., Form submission confirmation, notification emails, data stored correctly)
- Behaviour: Actual outcome during testing. (e.g., Form submits but no email notification received)
- Status: Indicate whether the test passed or failed.
Tracking Issues with JIRA
To track and manage issues:
- Set Up Your JIRA Account: You’ll receive an email from Atlassian to set up your account.
- Access Your Project Board: Log in to JIRA and select your project from the "Projects" dropdown menu.
- Submit and Track Issues: Use the project board to report and monitor any issues that arise during testing.
Following this structured approach will help ensure your website is thoroughly tested and ready for launch.
_1.png "kanban_board-(1).png")
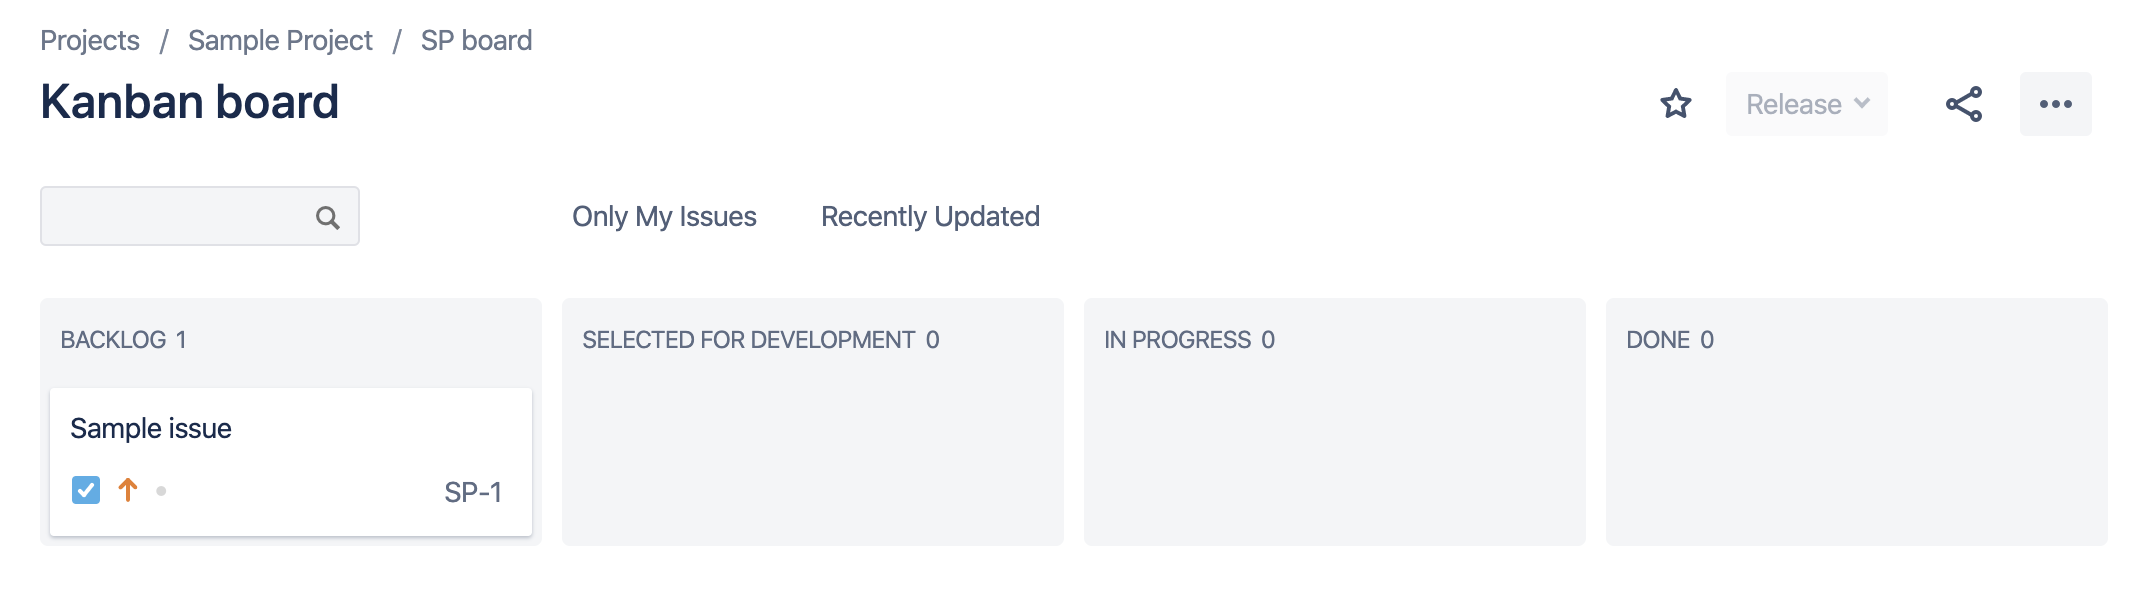
Understanding the JIRA Board
The JIRA board is organized into the following columns: Backlog, Selected for Development, In Progress, Review, and Done.
- Backlog: All new issues start here.
- Selected for Development: Once approved, issues move here and are assigned to a team member.
- In Progress, Review, Done: Track the progress as issues move through these stages.
Important: For beta testing, add issues to JIRA as soon as they arise to ensure timely resolution. You can monitor progress as issues move across columns and communicate details using the comments section. Use the @ symbol to tag team members directly. Please avoid moving issues between columns yourself, except to mark them as "Done" when resolved.
Creating Issues in JIRA
- Click Create in the top menu or + Create Issue in the first column.
- Enter the issue title in the Summary field. Avoid adding lengthy text or descriptions here.
- Click Create.
- The issue will appear in the Backlog column. Click on the issue to add more details in the Description section.
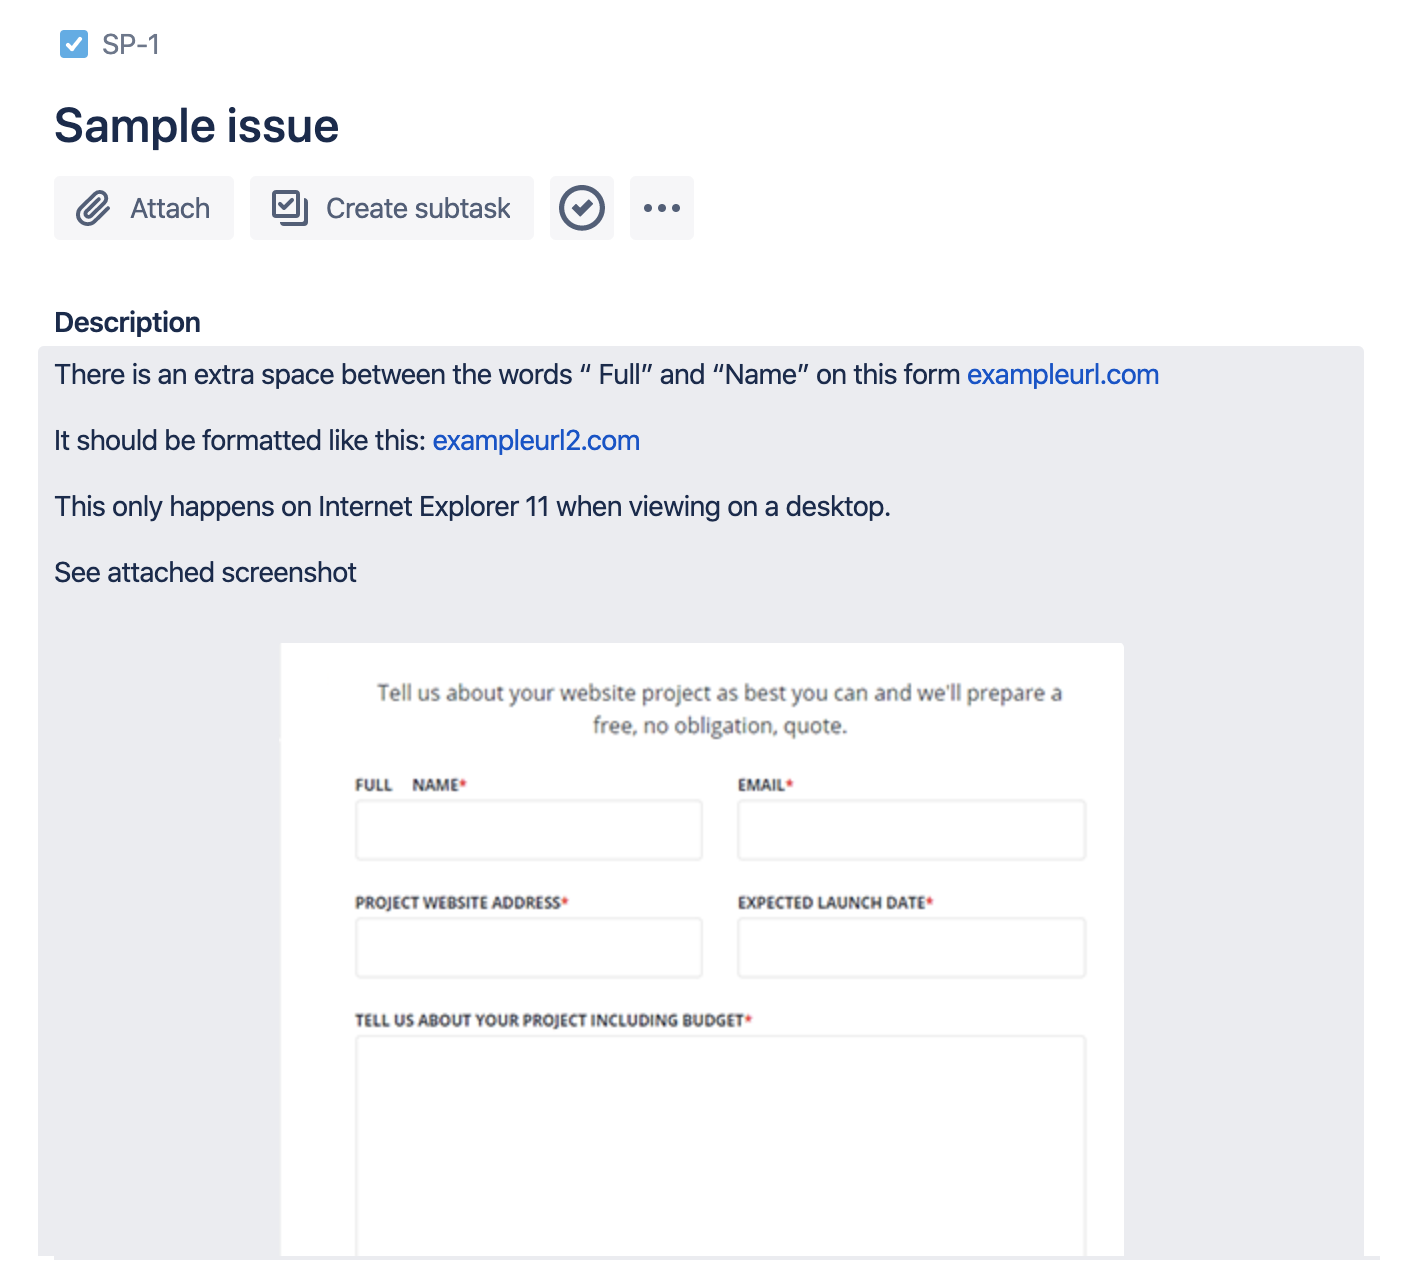
Communicating Your Issues
When submitting an issue, include detailed information to expedite resolution:
- Steps to Recreate: Describe how to reproduce the issue.
- Expected Behavior: Explain what should happen.
- Supporting Material: Provide links, screenshots, or videos.
- Environment: Include browser, operating system, and device details.
Example of a Well-Documented Issue:
- Summary: "Contact form not sending confirmation email"
- Description: "Steps to reproduce: 1. Go to Contact Us page. 2. Fill out and submit the form. Expected: User receives confirmation email. Actual: No email received. Tested on Chrome, Windows 10, desktop."
- Attachments: Screenshot of form submission page.
This level of detail helps our team quickly understand and resolve the issue.
_1.png "sample-issue-(1).png")
In Conclusion
The testing phase is extremely important. Taking the time to understand what to communicate and how to do it can save valuable time and ensure that your launch goes smoothly. Happy testing!

Alex
Senior Project Manager
Alex Treen is the Senior Project Manager at Inorbital, specializing in member-based solutions. Alex oversees project lifecycles, ensuring timely and budget-conscious delivery of dynamic websites for a diverse clientele. He has over 10 years of experience managing digital projects with a background in Psychology and Web Design.